Friday 31 January 2014

new quilting books

Given that Christmas was five weeks ago, I guess it's time for me to show my new books!

They are all very different and each will challenge me in different ways as I work through my "new" skills challenge for Something Old, Something New during the year.

To expand my skills in free motion quilting, I have First Steps to Free Motion Quilting by Christine Cameli, recommended by Deb at a simple life quilts. I haven't even opened the book yet, I'm waiting until it's time to add FMQ to my challenge. If I open it now, I may want to get stuck into it!

To introduce me to the techniques of trapunto, I have Shadow Trapunto Quilts by Geta Grama. I have followed Geta's blog for a few years now and the work she does in trapunto always amazes me. Again, I have not yet opened this book -- I will wait until the month comes to try this technique.
My quilting class begins next Monday after a seven-week Christmas/summer break. We are going to learn foundation (or paper) piecing and this book will help with that. I have admired the work of Mary Lou Weidman for a couple of years and this book brings my collection of her books to four. I am looking forward to trying a couple of the blocks in Out of the Box with Easy Blocks.

That reminds me, I haven't showed you another of her books that I bought from eBay. I think it was her very first book. It is called Whimsies and Whynots. I love the whole concept of a "story" quilt although they don't seem like the thing I would do for our charity quilting group due to the time and amount of work involved.

I've had Log Cabins Today in my collection for a while but I can't see that I've posted about it. Log cabin blocks are so versatile but what got my attention was the setting of the one on the cover.


What about you?
Have you added any new books to your crafting library lately?


Wednesday 29 January 2014

too special not to share

This has nothing to do with crafting or even to do with me.

I am not into wrestling.

But I had to share this video.

We need more people like this.

God bless you, Demetrius.

Sunday 26 January 2014

a day on the harbour

If you’re looking for the first post in this trilogy, you can find it here.
The second post can be found here.

Thanks for sticking with me -- I know many non-Sydney-siders appreciate the photos of our beautiful city. And I’ve shown you only a few of the vast number taken! ;-)

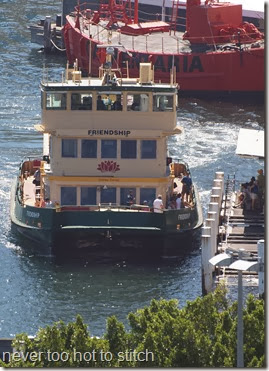
After a lovely buffet breakfast at our hotel, WM and I checked out and left our bag with the concierge to take advantage of the beautiful weather. We caught a ferry from Darling Harbour to Circular Quay. This photo of the ferry arriving at the wharf was taken the previous morning from our balcony. The vessel in the background is moored outside the Maritime Museum which we have never visited.
D1175323
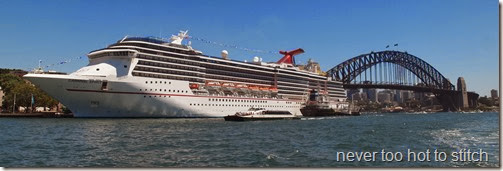
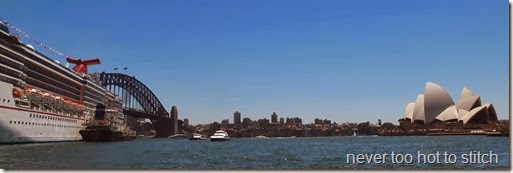
Coming into Circular Quay, we saw this massive cruise ship, the Carnival Spirit. You can only get an idea of its size when you see it with the Harbour Bridge and/or the Opera House in the background.D1185405
D1185406
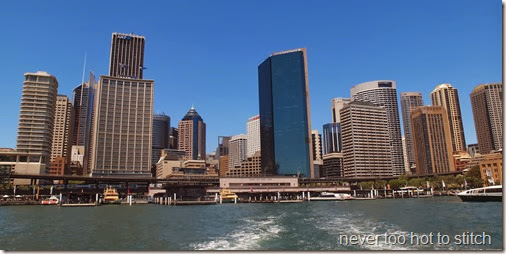
Sailing away from Sydney Harbour, the buildings looked like they were falling! Funny how our eyes play tricks on us sometimes, isn’t it? The building with the curved facade (on the left of the photo, behind the ferry) was the first skyscraper in Sydney – at fourteen stories it dwarfed all the other buildings for years! When I was in (junior) high school, it cost 20c to travel to the observation deck at the top of the building!
D1185407  
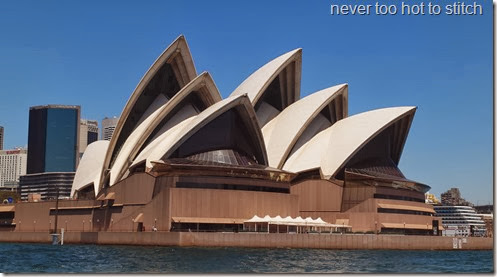
This iconic building in its beautiful setting needs no introduction, does it? (That cruise ship still looks enormous, even from this distance!)
D1185410
And this must be one of the most well-known pictures of Sydney!
D1185411   
We decided to go from there to Watsons Bay but, being summer, school holidays and a Saturday, found the place way to crowded so we didn’t stay long.
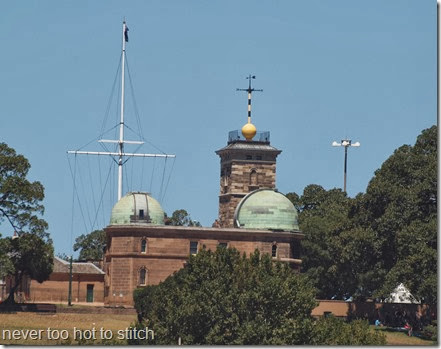
When we got back to Circular Quay, we decided to avoid all the crowds and catch the ferry back to Darling Harbour and go home! I could see WM was disappointed with that decision, so we got off the ferry at Balmain East, where we sat in the shade (it was very hot and we both had been sunburnt but weren’t aware of it yet) in a small park, close to the wharf. it was so nice to be away from the crowds (you can see we are really not city people!). I lay on the hard park bench, WM took yet more photos. The first is of Sydney Observatory.
D1185415
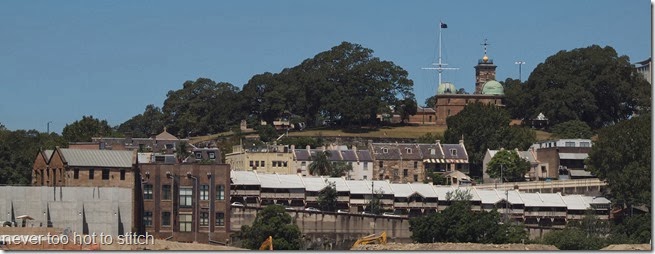
The next photo is of an historic area of Sydney, known as The Rocks, site of the first British settlement. This is a less well-known, less tourist-y part of The Rocks. The area in front, where the excavators are, is known as Barangaroo, and is under development. There is to be public park and, I’m told, another casino. Given that this is Australia Day, the 226th anniversary of the landing of the First Fleet in Sydney Cove in 1788, this photo is very appropriate.
D1185417
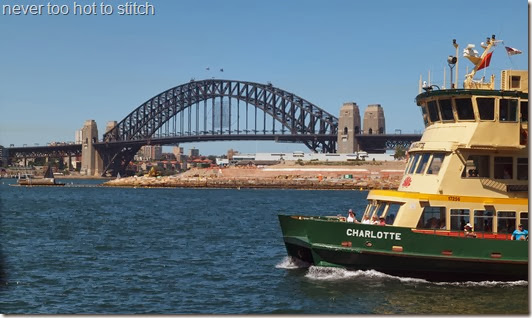
The last photo is of the ferry (we had been on previously) going back out of Darling Harbour (passing the park in Balmain East) into the harbour proper. That’s the Barangaroo development in the background,
D1185418   
Around 3pm, we suddenly realised we were hungry so caught the ferry back to Darling Harbour and found somewhere to have a nice salad for “dinner”.  All too soon it was time to collect our bag, catch the tram to Central station and a train heading west. We arrived home at 6:30pm, tired but happy. It had been a great few days but we were in no hurry to visit the city again for a while!
I hope you’ve enjoyed these posts; this last one finished like a primary school composition (“What I Did on the Weekend”)!
Normal crafting posts will resume shortly.
Happy Australia Day to all my fellow Aussies!

Saturday 25 January 2014

The Museum of Sydney

(Re-titled post since it appears no one wants to read this one under the misapprehension that it is the same post as yesterday! )

If you want Part 1 of this story, you can find it over here. It tells of our first night in the city, with photos of the fantastic views from Sydney's tallest building.

We woke up late on our first morning in Sydney. We had eaten very well the night before so neither of us was particularly hungry. We hung around in our hotel room for a while, enjoying the view and deciding what we wanted to do. Meanwhile, WM took more photos (using a zoom lens)  from the balcony.
D1175319D1175320
We finally decided to visit the Museum of Sydney, which opened in 1995 but neither of us has ever been there (I told you we don't get into the city much). The museum is built on the site of the original Government House, which was build during 1788, the first year of British colonisation. The museum was fascinating (both of us love this kind of history). We were allowed to take photos of most of the exhibits inside the museum so here are just a few of WM’s collection!

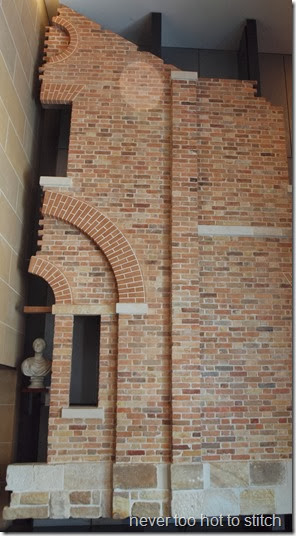
This full size replica of part of the facade of the original Government House is in the foyer but doesn't make any sense until one has been inside and seen the information about the first Government House.
facade replica of govenment house
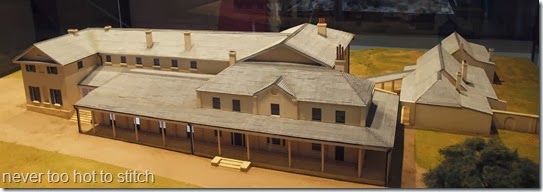
As you can see, Government House was a two story building. It was built as the home of the first Governor of the colony, Arthur Phillips, and subsequent governors for about fifty years until it was demolished in 1850 as unfit for human habitation.  WM and I were quite disappointed to read that – we though it was a lovely-looking building and a fine example of colonial architecture. It appeals much more to our taste than the ornate Gothic-style building which replaced it.

The original house was the two-story section (without the veranda) seen at the front right of the photo below (of a model of the house). 
model of first government house before demoliton
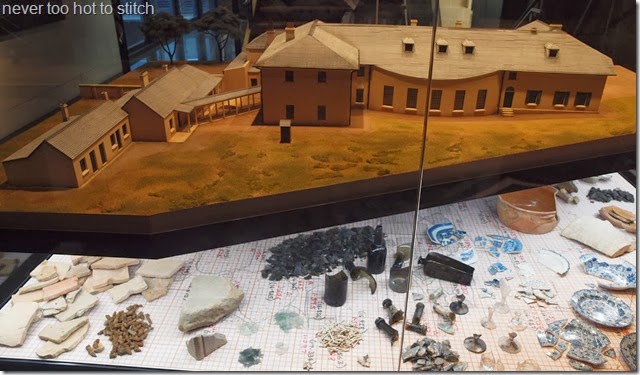
It was added to by successive governors and was a grand house but always contained structural problems, due to the original part of the building being hastily built by unskilled labour (the British Government of the time gave no thought to finding convicts with the necessary skills to build a new colony before transporting them). One of the loveliest features for me was the curved wall of the dining room, as seen in the photo below.
model of back of first government house before demoliton
The kitchens are in the building joined to the house by the covered walkway and the other smaller outbuilding housed the laundries. The photo also shows items found during the excavations which began in 1983, 84 years after workers on the site discovered the foundation plaque from the original building!

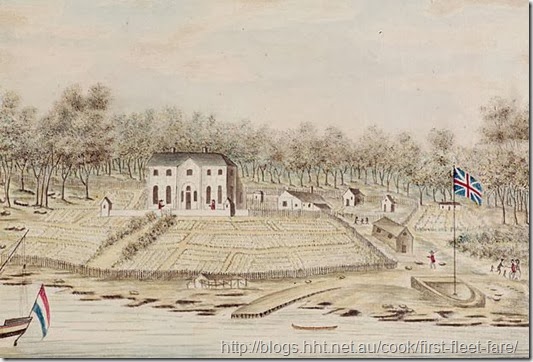
The next picture shows a drawing by colonial artist, William Bradley, of the house as it originally looked. I am intrigued by the proximity of the water and the gentle slop of the land – Sydney has reclaimed a lot of land since them and the museum building, erected on the same site, appears to be on much higher ground.
drawing of first government house
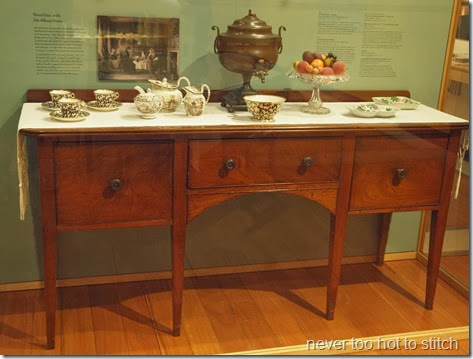
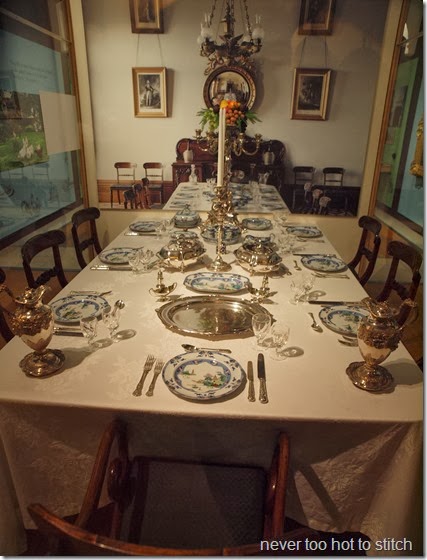
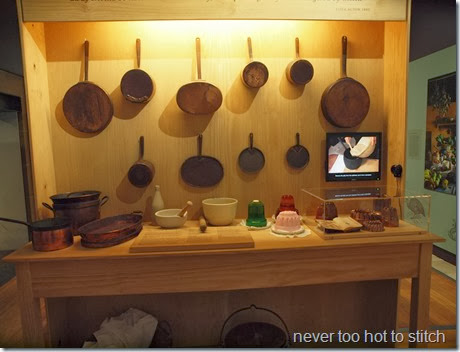
Another area of interest inside the museum had to do with food served in Government House  – furnishings, table settings and cookware as well as the kind of food itself.
   D1175326 
The table set à la français.
 D1175329
The “batterie de cuisine”.
D1175330
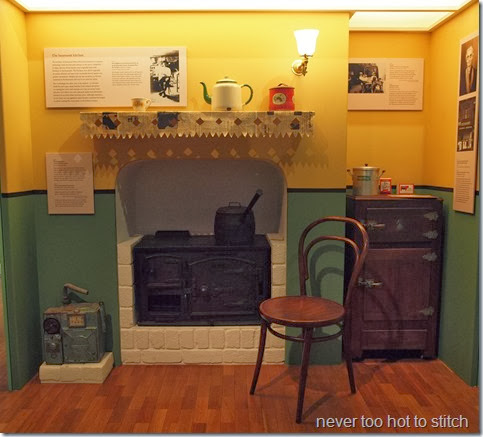
a suburban kitchen from a later period
D1175331
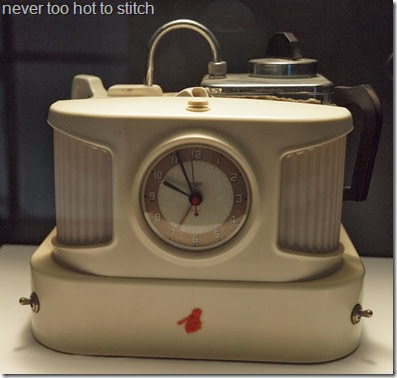
And a personal favourite for me: a TeasMaid – my parents brought an identical one of these to Australia from England; it was a wedding gift. It sat on a table on my father’s side of the bed and they used it daily for many years – mum poured the tea while dad got ready for work. Surprisingly, they were able to replace it with another which my mother still has but I doubt she uses! The water boiled at exactly the time the alarm went off and made its way from the kettle on the right to the teapot on the left. Purists wouldn’t like it – the teapot was not warmed before the tea was made!
teasmaid
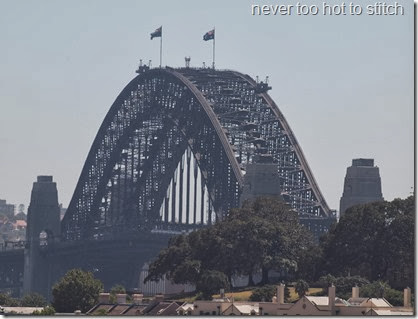
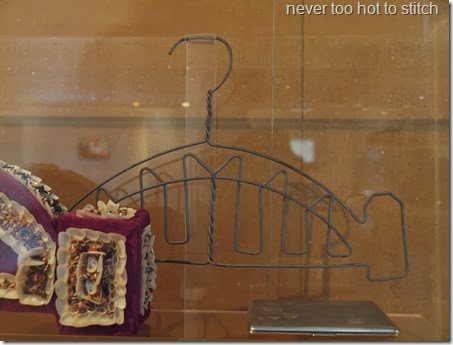
The Sydney Harbour Bridge opened in 1932 and there were many commercially available souvenirs but Australia, like the rest of the world, was still in the throes of the Great Depression so handmade souvenirs were also produced, like these two – one made from shells by an Aboriginal woman and sold to tourists, the other from two wire coat hangers. not surprisingly, one of the nicknames of the “The Bridge” is “The Coat-Hanger”!
D1175336
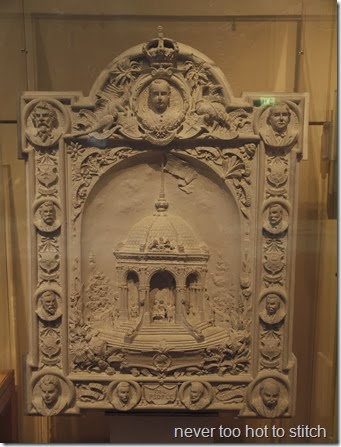
The following photo is of a plaque made to commemorate the Federation of Australia in 1901, when six separate colonies formed one country! It shows the building erected in Centennial Park where the “onstitution of the Commonwealth of Australia” was signed by Queen Victoria and the first prime minister of Australia, Sir Edmund Barton.
D1175334
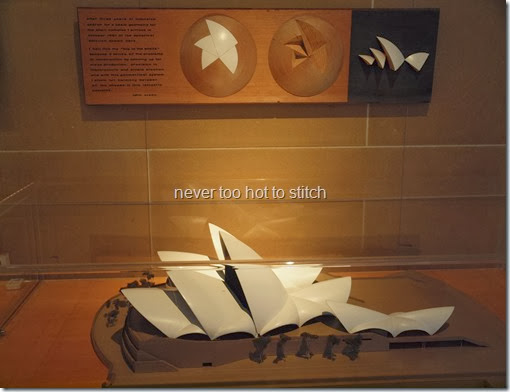
Here is the way that Jørn Utzon, an architect from Denmark, worked out the construction of the ‘sails’ of the Opera House. The building was opened by Queen Elizabeth II in 1973 and is a very famous Australian icon.

D1175333     

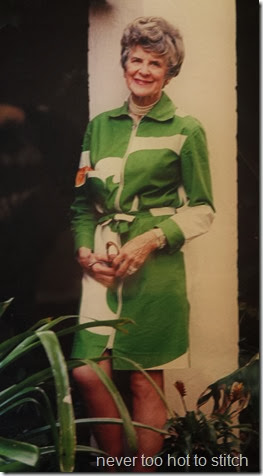
As some of you know, I am very interested in family history. I heard my maternal grandmother talk about “Lady Marion Best” many times but I wasn't sure who she was. You can imagine my delight in seeing a photo of “Marion Hall Best” in the Museum. She was an interior designer who had a small shop in the Sydney suburb of Woollahra. My grandmother retired from her upholstery and furnishings business (see where I get my stitching genes from), Nichols and Keep, in 1975. The partnership worked from Bondi Junction and, apparently, did quite a bit of work for Lady Marion Best.

 D1175340

We enjoyed our time at the museum very much and were disappointed to have to go, but it was time for our next adventure – Sydney Jet Boat.

Naturally enough we couldn't take a photo on a boat skidding, sliding and doing u-turns across the choppy waters of the Harbour, so this is a photo taken by WM the following day as the boat returned to Darling Harbour. As you can see, the passengers are very wet. We weren’t too wet – we wore the ponchos offered to us! We had a great time, thirty minutes well spent!
jet boat
Come back tomorrow for the final part of this thrilling saga…LOL

Friday 24 January 2014

a romantic getaway

warning: long, photo-heavy post!
Last week, WM and I were away from home for a couple of days. Although we live in the outer suburbs of Sydney, we rarely visit the city itself. We decided that for our anniversary (3 December) and Christmas gifts to each other, we would play tourist in our own city.

WM finished work at 2:15 on Thursday afternoon and by 3:30 we were on a train heading to the city. We had booked a one-bedroom apartment overlooking Darling Harbour which is, in itself, part of beautiful and extensive Sydney Harbour. This map shows the extent of the harbour – it is thirty kilometres (19 miles) from the heads on the right to the weir in Parramatta. The city itself is where the words “Circular Quay” are written on the map.
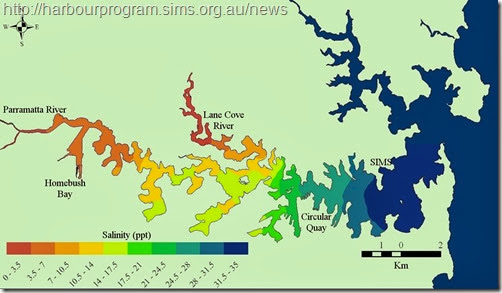
salinity map of the harbour
The view from our room was of Sydney skyline looking directly across Darling Harbour
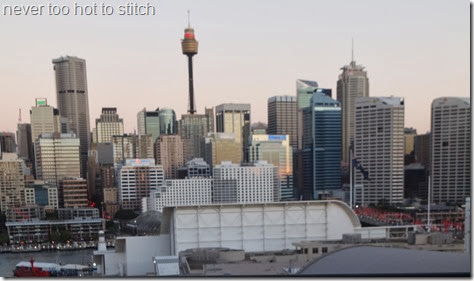
view of city from balcony
night skyline from balcony
or north along Darling Harbour towards “the Bridge”
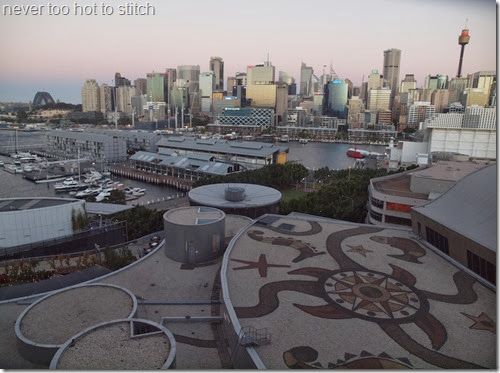
view from balcony at sunset
Yes, Carol, that is artwork, done in pebbles as far as we could tell from four floors above!
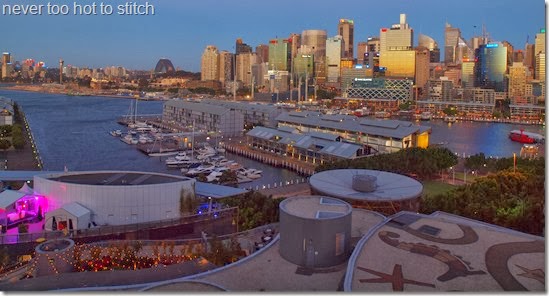
twilight view
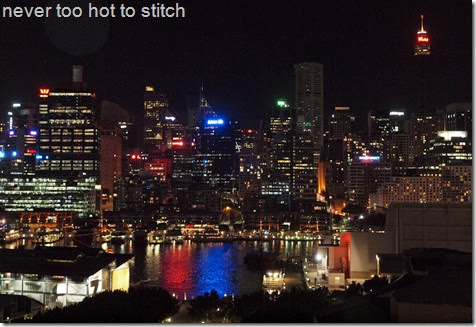
We walked into the city to have dinner in a revolving restaurant at the top of Sydney’s tallest building (the tower seen in the photo of the city skyline). The food was great, we tried most things on the buffet (small samples only) and the company fantastic but the real reason to be there was the views of Sydney and beyond. The weather had been very warm, 30°C (88°F) plus for over a week, so there was a lot of haze. The windows were not as clean as they could be (salt laden winds) and the reflections of the inside of the restaurant in the enormous windows didn’t make for great photography but I’ll share some of the better ones with you.

The first is looking towards North Sydney. The circular building in the foreground was the tallest building in Sydney in 1969. The big windows at the top are outside a revolving restaurant (although I’m not sure if it still operates given the number of taller buildings around it now).
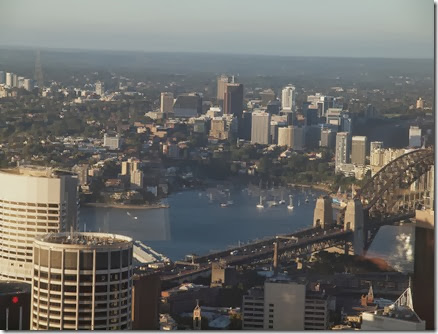
towards North Sydney
And here it is by the time we came around again, about 45 minutes later.
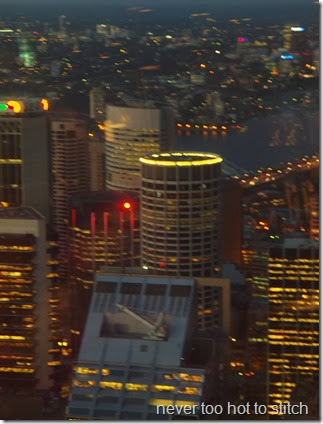
Australia Square Tower at night
The next photo is the view across Darling Harbour towards our hotel, which is in the top right of the photo with the triangular shaped light on top of it!
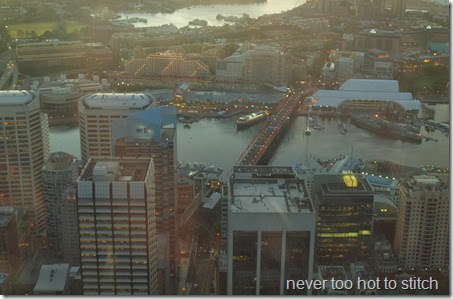
Darling Harbour sunset
You can see our hotel more clearly in this photo, it’s the building that says “The Star” (Sydney's only casino, and no, we didn’t go near the gambling facilities). We were in the end of the building closest to the centre of the photo. (Sorry about the reflections from inside the restaurant!)
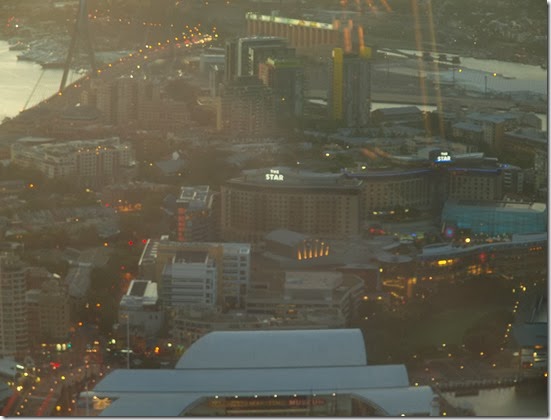
The Star from the tower at dusk
The next photo shows a ferry just coming into the part of the harbour known as Darling Harbour, which is where our hotel was located.
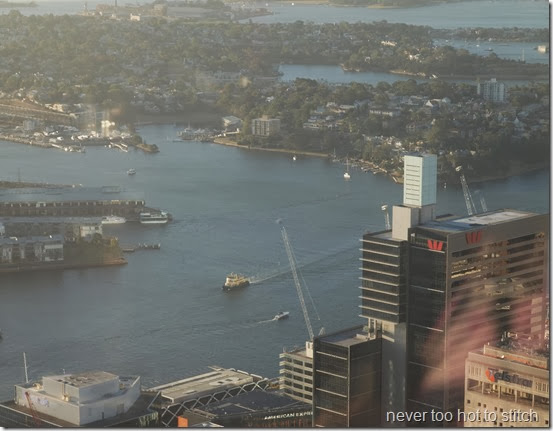
view over Darling Harbour entrance
This a photo looking towards The Heads – the entrance to Sydney Harbour. Outside is the Pacific Ocean (well, officially the part of it known as the Tasman Sea, between Australia and New Zealand). In 1770, Lieutenant James Cook sailed past these heads and noted that there was an entrance to a “small harbour” – little did he know what was really hiding inside that small opening! The vintage etching shows the true size of that “small” harbour”!
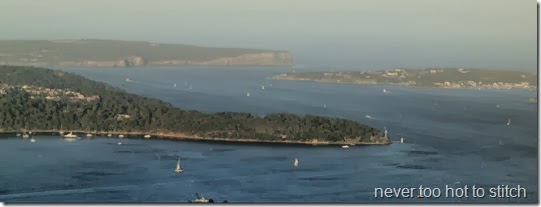
The Heads
vintage map of Sydney Harbour
We chose to go for dinner so that we would be there for sunset (romantic except, perhaps, when you're sharing dinner with a camera and a blog). You can see the light is fading fast. This is a view over the eastern suburbs as they catch the last rays of the sun. Those tall buildings in the background are at Bondi Junction, which is very close to the world-famous Bondi Beach.
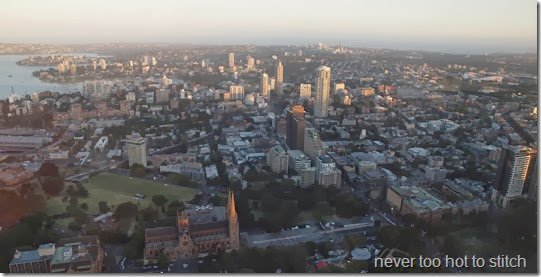
 eastern suburbs catch last rays 
A block away from the shopping complex on which the tower is built, is Hyde Park (named after the place of the same name in London). On the other side of Hyde Park is St Mary's (Catholic) Cathedral. I wanted to get married there when I was a teenager; it has the longest aisle I have ever seen and I had visions of Julie Andrews as Maria heading towards the Captain in the wedding scene from The Sound of Music! Alas, no long train for me! My dress was much simpler. When I was a young teenager, the cathedral has no spires, they were added in 2000.

The green circle on the left of the next photo and the white circular ‘building’ on the right of the photo are temporary, they are part of the Festival of Sydney which runs over sixteen days in January (summer break here). The green circle holds an inflatable full-size replica of Stonehenge called “Sacrilege”; it’s pretty big, look at the size of people next to the ‘stones’.
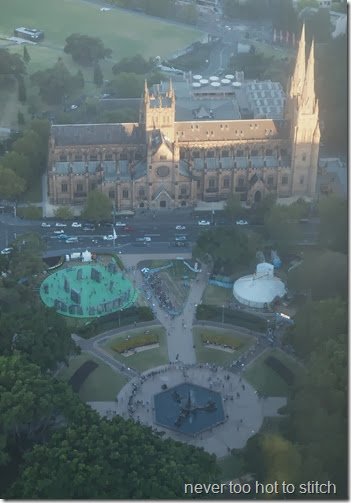
St MArys catches last rays 
So, to finish our photos from the Sydney Tower Buffet Restaurant, one of the shots of the sunset that we managed to get; looking over Darling Harbour. Our hotel is the one with the big blue light area in the centre of the photo; that’s the Sky Terrace rooftop bar in action for the Festival of Sydney.
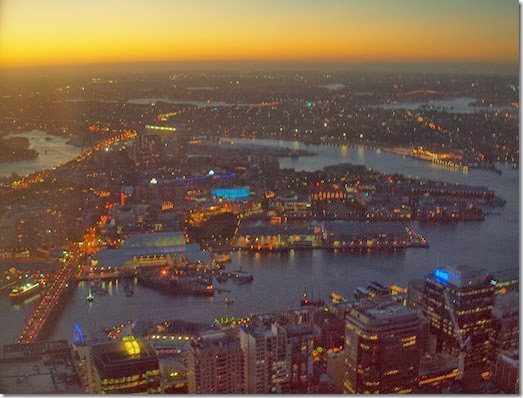
looking over Darling Harbour at night   
It was a warm night when we came down from the restaurant at about 9:00 so we decided to wander over to Hyde Park and see what was happening. WM was, as usual, taking arty shots but I was entranced by the guitar playing of this young man whom I had never heard before.
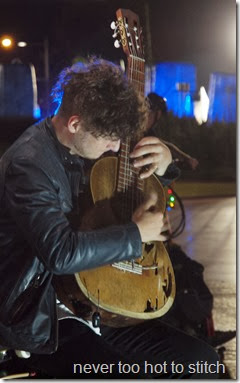
Tom Ward
His name is Tom Ward and yes, his guitar really is as battered as it looks. We bought a CD and tried to say something intelligent but you know how it is when you’re awestruck by someone’s brilliance. Hop over to his website and listen as he performs his own composition on Australia’s Got Talent. I’d offer you a video from YouTube but I think this post is long enough all ready!
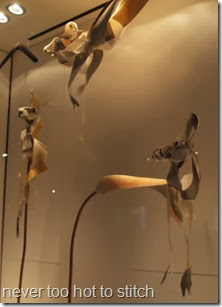
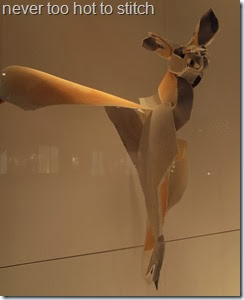
On our way back to the hotel, we passed the Hermès shop and two of the windows caught our attention. The first contained these old skis and poles; the second contained these kangaroos made from torn (cotton) paper by Anna-Wili Highfield. I thought they were amazing! (Take a moment to go over to her website and look at her works – stunning!)
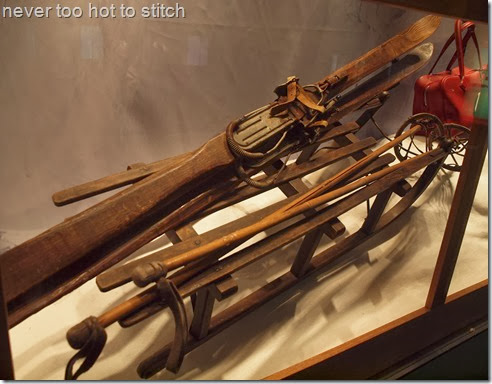
old skis and poles - Hermes
kangaroos Anna-Wili Highfield  kangaroo by Anna-Wili Highfield
So that’s it for the first few hours of two and half days! I guess there’ll be another post later!
See you then in our amazing city!

Wednesday 22 January 2014

feeling my way through

In the nearly-four years I have been quilting, I have never followed a pattern.

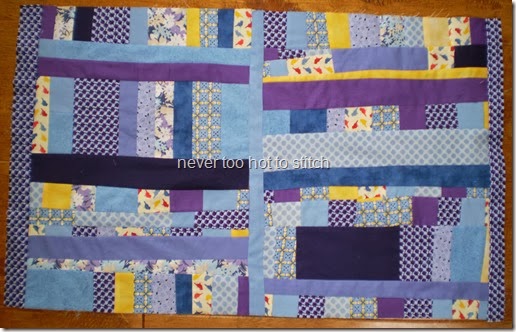
I followed the instructions for making the blocks for my second quilt, Modern Sampler quilt from Oh! Fransson (which has been updated since I downloaded my instructions) but only because I knew absolutely nothing about how to make a quilt - I'd never used a rotary cutter and ruler, I'd never pieced small pieces (accurately or otherwise), I'd never pressed seams in one direction (I did press seams when I made my own clothes and, to be fair, Elizabeth Hartman from Oh! Fransson presses her quilting seams open too)!
 2011 finished quilt
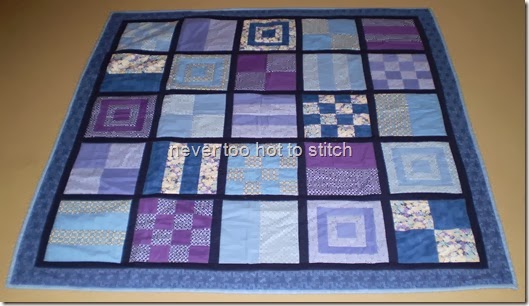
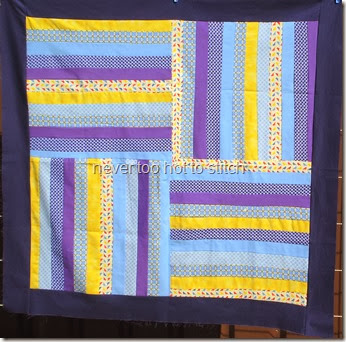
Yes, I said my second quilt. My first quilt, made with DD, was cut in strips with scissors and pressed as best as I knew how (somehow, probably through the internet, I found out the seams were pressed in the same direction). I still remember my exultation when the four big blocks we'd made came together in a perfect + in the centre. It was "squared off" by eye and guess work using the rotary cutter which I had finally purchased and a very wobbly 2.5" x 36" binding ruler! It was almost a year later before we found a teacher and we learned to make a quilt sandwich, quilt (in the ditch) and bind! The photo is of the finished top – I wasn’t aware I had no photo of the completed quilt!
2010 project #1 floor mat with border
I spent quite a lot of 2013 making sampler blocks in class -- I wanted to practise my accuracy and learn as many tricks as I could and that was one way to do it. But, you know what? I'm not really excited by sampler quilts and I think I've learnt just about all I can from these particular blocks. These are the first five; they are basically pieced nine-patch blocks.
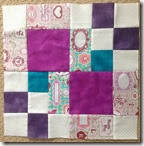
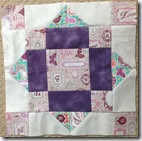
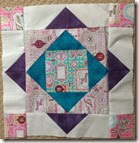
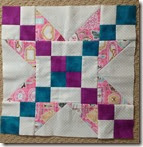
1 Domino 2 Oregon Trail 3 Cajun Spice 4 Pathways 5 Blocks and Star
So, back to my opening sentence. I have never used a pattern. In general, I don't even create my own design in advance, well not in the traditional sense of using pencil and paper, or even software (although I am a technology addict)! Instead I tend to "feel" my way through the quilt making process. Let me give you an example:

In 2011, inspired by Kate at Kate's Quilting (and other arty stuff), I joined in with the Rainbow Scrap Challenge (RSC, which still runs and is hosted by Angela on SoScrappy blog). I had finally accumulated enough scraps in my very short quilting life and was ready to participate. I had no idea what blocks to make. All I knew was I didn't want to make the same block over and over for twelve months or more! I had dabbled with using scraps ("crumbs") when making a change-table mat for Older Grandson from the left-overs of those first two quilts,
2011 change table mat #2 2
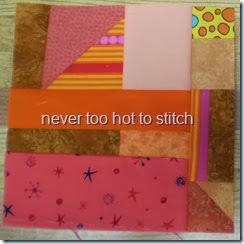
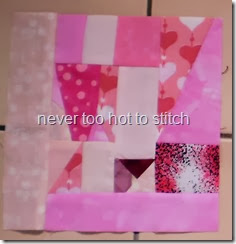
so I decided to make what I called "improv" blocks (hey, I was a new quilter and didn't know the terminology!). Every block would be different so there was no room for boredom! What I didn't realise is how long it would take to make one 6" block from all those tiny pieces (fourteen in this 6.5” block)!
2012 orange improv
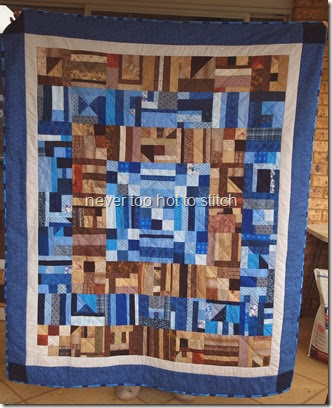
Anyway, I eventually ended up with 99 blocks over a fourteen-month period (I made other blocks for the RSC along the way but they're not part of this story). Most of the blocks sat patiently waiting, first on a shelf where I could see them and and then in a drawer where I couldn't. The 17 brown ones and 22 blue ones (along with some strings and nine-patch blocks) were used in 2013 to make this quilt.
2013 Earth and Sky quilt finished
Since Christmas, I have renewed my acquaintance with, and love for, the story quilts of Mary Lou Weidman (introduced to me by Michele, of With Hearts and Hands, a maker of art quilts). While thinking about how I could use this year's Rainbow Scrap Challenge and merge it with a fun "story" quilt, I began to think about those crumb/improv blocks and how I could use them.

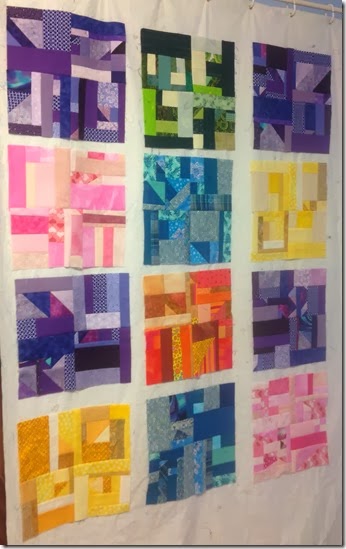
A couple of weeks ago, in the wee early hours when I couldn't sleep (you know how it is sometimes), it occurred to me that I could join four 6" improv blocks into one 12" block and therefore need less sashing fabric and less cutting, pressing and seaming to get a quilt top done. In my mind, lying there in the dark, those four blocks merged seamlessly into a large block of one colour and looked fabulous. I would find a polka dot fabric (or a colourful striped fabric) on a white background to sash and border twelve of those large blocks and call it done!

Well, reality is not quite the same as my imaginings! I had made those improv blocks with no thought for tone; all that mattered was that all the pieces, no matter how small (21 pieces in the block below), were of the same colour family. The result was blocks that were an interesting mix of lights and mediums with the occasional dark.
2012 pink improv 2
Just because they were of the same colour family, didn't mean they wanted to play nicely together (isn't that just like families? LOL). Adding my own " rule" of not having pieces of the same fabric too close together just complicated joining those large four-patch blocks even more!

It was while I was pinning those blocks that I thought a white-based fabric possibly wasn't going to work for sashing! There were too many light colours on the outside edges of my blocks. Instead of looking crisp as they did in my head, the lights would merge with the white and the square-ness of the block would be lost. More thinking (feeling my way through) was needed.
V&F finished flimsy
Later, it occurred to me that if I put a border around each block, I wouldn't need sashing; in fact, the borders would increase the blocks to the point where I couldn't add sashing if I wanted to or my quilt would be over the Caring Hearts Community Quilters' size restrictions (45-54” x 60-70”). But what would I use for borders that wouldn't make the whole thing look like a hodge-podge? It would need to be solid, or read as a solid, to give the crisp effect I was after. I didn't have fabric the colours I needed to make self-coloured borders (working within the restrictions of donated fabric and my limited stash is challenging in itself). I couldn't think of a single fabric I had available that would work for all twelve blocks either.

I thought I might border half the blocks in black and the other half in white (or a light neutral) and assemble the whole thing as a checkerboard! However, I had seven dark blocks and five light blocks so the checkerboard would work unless I replaced one of the dark blocks with a light one! Here’s the layout so you can see what I mean:
V&F layout
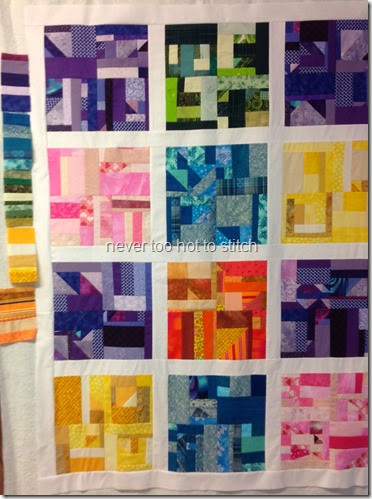
So, after an email discussion with Debbie of Stitchin’ Therapy, I went back to my original idea of white sashing. To get the quilt to the right size, I needed 3” sashing but that didn’t work in my head. So I decided on 2” sashing and a coloured border.

The first coloured border I tried was an attempt to use string blocks I had already made for the Rainbow Scrap Challenge (2011/2012). I was going to cut them in half, giving me a border 2.75” wide. But it just wasn’t working for me!
V&F string block border maybe
Since there are more purple blocks than any other colour, I decided to change the name from the prosaic Improv Blocks quilt to Violet and Friends. ;-) 


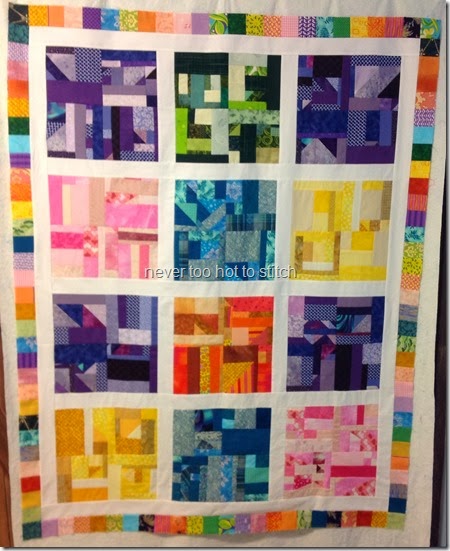
Finally, I settled on a border made up of 2" squares in the colours in the larger blocks – the squares would echo the big squares in their shape and colour (repetition and gradation are two design principles I learned in art school).
Never too hot to Stitch!
So here it is. The flimsy of Violet and Friends quilt -- my "Something Old" project for January. It has moved from being a UFO to a WiP which I plan to finish next month.
V&F finished flimsy
I was too late for the party -- I was going to link this post to Jessica's blog, Quilty Habit, for her Sewing With Certainty series. You can pop over to Jessica’s blog to see other people’s thoughts on designing quilts.
Coming in November!
What about you?
Do you use patterns or do you design your own quilts? Maybe a bit of both?
Do you use pencil and paper or a software program?