Jesus is alive! Truly the "greatest day in history".
Additionally happy for us, DD convinced SIL to return home for Easter and they're having an Easter egg hunt and dinner here with MIL, WM and I!
Praise the Lord for His blessings!
Sunday 31 March 2013
Friday 29 March 2013
Thank Goodness It’s Finished Friday

It’s not the one I hoped to have – although that came close.
This is an previously unpublished project.
A few weeks ago, my quilting teacher was talking to us about making a quilt each for the Gift of Hope project. Basically, the quilts are made and donated to families whose babies are still-born or die soon after death. My teacher says “born asleep”.
It’s a sad project but I wanted to help.
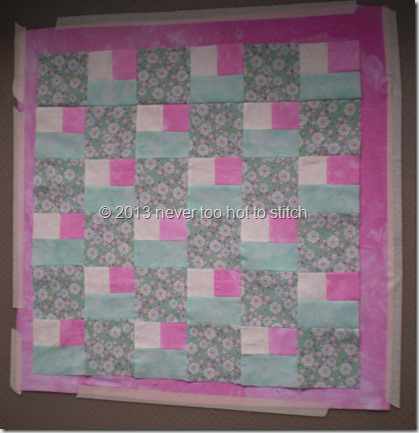
Here is a picture of the backing taped down ready for basting and the flimsy lying on top.
I tried hard to buy some suitable green fabric for the binding.
I had plenty of the pink but felt it would overwhelm the whole thing. I didn't have enough of the white-on-white print to make binding and thought a slightly darker blue-green would be perfect. Of course, the colour in my head was not available.
At Caring Hearts Community Quilting group yesterday, someone found a white fabric with a tiny gold print on it that I could use.
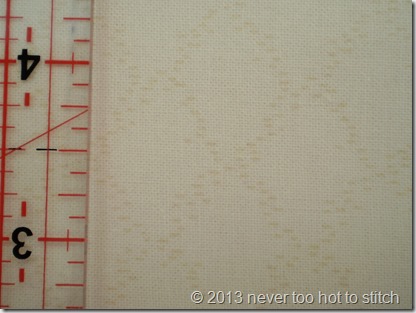
So last night, I made binding and hand-stitched it down. But, of course, I had to wait for daylight to take photos!
First the backing – a hand dyed fabric donated to the quilting group (I also used this on the front).
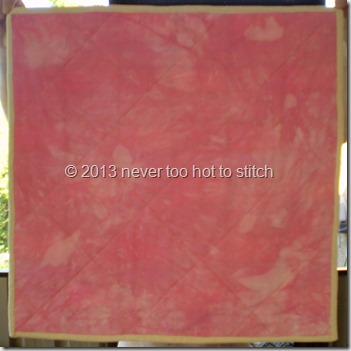
I quilting diagonally through the floral squares. This photo also gives the most accurate colour of the fabrics.

Finished size - 24" x 24".
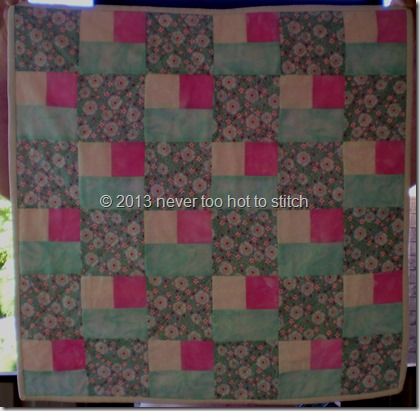
Thank goodness I had a finish to show!
I'm also linking this project with Barbara's New FO party. Pop over to Cat Patches and see the projects that were started by other bloggers in March.

What about you? Do you have a finish to show this week?
Tuesday 26 March 2013
slow un-stitching Sunday
After the frustration and tears of Saturday, I took it a bit slower on Sunday. I kept being reminded of a saying my mother had when I was a child, “more haste, less speed”. I didn’t understand it then and, half a century later, I still don’t really understand it. I gather she wanted us to move quickly but…
Cambridge Dictionaries Online explains:
Anyway, I digress. Back to the quilt I showed you in yesterday’s post. The eagle-eyed among you would have noticed that the blocks should have alternated horizontally and vertically but the column I had just attached was identical to the one beside it!
Of course, the first step to fixing it was to rip out two 66” inch seams. That was slow going because real ripping (in which I just use the seam ripper to tear at the stitches) results in seams coming undone that I want to stay sewn. Even so, I had to sew a few seams back together before proceeding. I was tempted not to but I knew I would regret it.
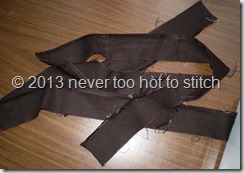
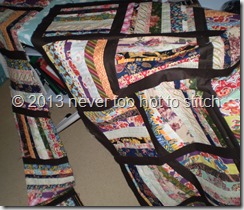
The pictures show 66” of ripped out sashing and the offending blocks removed from the top.

And lots of pinning (yes, I’ve learnt that lesson).

And moderately slow stitching.

All of which resulted in a finished top which is now basted and is in the process of being quilted on my normal machine. {Yes, I know I have a quilting frame but the garage is still hot! Despite the fact that it’s autumn, the temperature is forecast to be over 32°C (90°F) every day this week! And the humidity… phew!}
I do my basting in class as much as possible. There is a big table which I can use which saves me crawling around on my hands and knees and ensures that the backing and top are pulled tight enough (I always have a problems with one or the other if I attempt to baste either on the floor or on my quilting frame). But the best part is my teacher and the store owner, sometimes even my class mates, jump in and help which gets the job done in record time and makes it much more fun!
Now the race is on – will I get it finished in time for a big reveal for Thank Goodness It’s Finished Friday (which I am hosting this week)? Or will I have something else to show? Is it possible that I will host and not have a finish?

Y’ all come back then to see!
Cambridge Dictionaries Online explains:
said to mean that if you try to do things too quickly, it will take you longer in the endApparently it’s a uniquely British saying, which makes sense since my mother was born and raised in Kentish Town, north London!
Anyway, I digress. Back to the quilt I showed you in yesterday’s post. The eagle-eyed among you would have noticed that the blocks should have alternated horizontally and vertically but the column I had just attached was identical to the one beside it!
Of course, the first step to fixing it was to rip out two 66” inch seams. That was slow going because real ripping (in which I just use the seam ripper to tear at the stitches) results in seams coming undone that I want to stay sewn. Even so, I had to sew a few seams back together before proceeding. I was tempted not to but I knew I would regret it.
The pictures show 66” of ripped out sashing and the offending blocks removed from the top.
Then came some pressing with my new Semco cordless iron (WM reckons I bought it because it’s purple but I’ve wanted a cordless iron for years. And this was really inexpensive. I will talk more about it in a later post).

And lots of pinning (yes, I’ve learnt that lesson).

And moderately slow stitching.

All of which resulted in a finished top which is now basted and is in the process of being quilted on my normal machine. {Yes, I know I have a quilting frame but the garage is still hot! Despite the fact that it’s autumn, the temperature is forecast to be over 32°C (90°F) every day this week! And the humidity… phew!}
I do my basting in class as much as possible. There is a big table which I can use which saves me crawling around on my hands and knees and ensures that the backing and top are pulled tight enough (I always have a problems with one or the other if I attempt to baste either on the floor or on my quilting frame). But the best part is my teacher and the store owner, sometimes even my class mates, jump in and help which gets the job done in record time and makes it much more fun!
Now the race is on – will I get it finished in time for a big reveal for Thank Goodness It’s Finished Friday (which I am hosting this week)? Or will I have something else to show? Is it possible that I will host and not have a finish?

Labels:
class,
not knitting related,
progress,
qui,
quilt,
quilt blocks,
quilt top,
quilting frame,
ripping
Monday 25 March 2013
one of those days
You know the kind I mean.
Where you seem to take two steps forward and one step back.
Where more ripping takes place than progress.
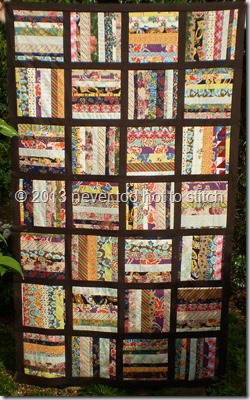
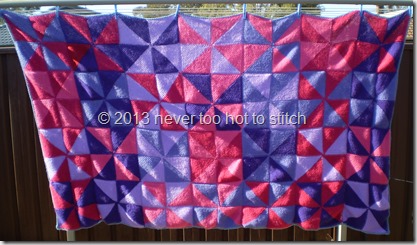
I started out with these:
And so I pieced this quilt top in the same way. It came out 44” x 77”. I pieced the backing to be two inches larger all round – 48” x 81”.
There it stopped. I never got around to quilting it.
A few months passed and I found out that the quilt size required was approximately 54” x 64”.
Clearly this quilt was too narrow and too long. I have known that for several months but have only just got to this UFO.
It should have been no problem. Remove the bottom row. Make two more squares. Cut some more sashing. Put it back together.
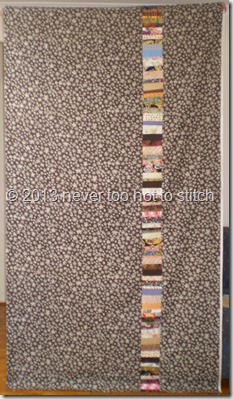
Cut the back down and find a way to make it wider. Ah yes, ten inches wider. Three sashings at 2” each plus a four inch panel of the main fabric – just as well I still had some of the fabric in my stash.
~~~~~~
I decided to work on the backing first – it’s more straight forward. First cut it down to 70”. Then unpick two 70” seams to remove the pieced panel.
Cut 2.5” strips WOF (width of fabric). Join the strips to make sashing 70” long. Sew the first sashing to the pieced panel. Oops! Should have used pins – unpick the whole lot! Re-sew.
Pin the second sashing to the other side of the pieced panel and sew. Good job. Uh-oh! What’s this? The sashing has been sewn on upside-down so that the joins are facing the outside. Unpick 70” of stitching. Re-sew.
Iron and cut two four inch strips from the main fabric. Join to make a panel. Sew sashing to panel. Perhaps I should have used pins? Err. I think I’ll get away with it!
Join two narrow panels to each other. Sloppy! Should have used pins! Rip. Re-sew!
Sew the narrower of the two side pieces to the stitched panel. Haven’t you learnt yet? Use pins! Rip. Pin. Re-sew! Pin last piece of backing to the panel piece, sew!
Backing finished – go and have a late lunch and read for a couple of hours!
~~~~~~
Ah, feeling better. Time to face the quilt top.
Rip the bottom row. Assess the situation. Find some appropriate scraps. Fortunately I have some strips of three of the fabrics that are used in other blocks. Measure the original blocks. Cut strips. Iron. Cut more strips. Sew strips in pairs. Join pairs (Look, mum, no pins!). Continue until blocks are made. Press, measure for size. Oops, too small.
Find another strip for each block. Rip one seam in each block. Add new strip. Press. Trim to size.
Cut 2” strips WOF to make sashing. Cut two 9” strips. Pin. Sew to blocks. Measure. Cut two 11” strips. Pin. Sew to blocks. Attach one block to the top and one block to the bottom of the four blocks that had previously been removed from the quilt top (because they have been made from the almost the same fabrics and need to be separated). Join sashing strips. Pin to side of blocks. Sew. Press.
Make another sashing strip. Add to other side using pins. Sew. Press.
Collect rest of quilt top from the family room. Look at it. Shake head. Look again! Realise the last sashing added wasn’t needed. Rip off newly sewn sashing.
Pin completed block column to rest of quilt top. Sew the last seam (finally). Begin pressing! What’s this ?!*^~*?
Leave it in tears. Go back to book!
Where you seem to take two steps forward and one step back.
Where more ripping takes place than progress.
I started out with these:
When I first started at Caring Hearts Community Quilters, no-ne told me what size to make the quilts, just “single bed toppers”. I didn’t know what that meant but then I remember that the wraps I knit were also single bed toppers and they are 40” x 70” (28 ten-inch square in a 4 columns, 7 rows configuration).

And so I pieced this quilt top in the same way. It came out 44” x 77”. I pieced the backing to be two inches larger all round – 48” x 81”.
There it stopped. I never got around to quilting it.
A few months passed and I found out that the quilt size required was approximately 54” x 64”.
Clearly this quilt was too narrow and too long. I have known that for several months but have only just got to this UFO.
It should have been no problem. Remove the bottom row. Make two more squares. Cut some more sashing. Put it back together.
Cut the back down and find a way to make it wider. Ah yes, ten inches wider. Three sashings at 2” each plus a four inch panel of the main fabric – just as well I still had some of the fabric in my stash.
~~~~~~
I decided to work on the backing first – it’s more straight forward. First cut it down to 70”. Then unpick two 70” seams to remove the pieced panel.
Cut 2.5” strips WOF (width of fabric). Join the strips to make sashing 70” long. Sew the first sashing to the pieced panel. Oops! Should have used pins – unpick the whole lot! Re-sew.
Pin the second sashing to the other side of the pieced panel and sew. Good job. Uh-oh! What’s this? The sashing has been sewn on upside-down so that the joins are facing the outside. Unpick 70” of stitching. Re-sew.
Iron and cut two four inch strips from the main fabric. Join to make a panel. Sew sashing to panel. Perhaps I should have used pins? Err. I think I’ll get away with it!
Join two narrow panels to each other. Sloppy! Should have used pins! Rip. Re-sew!
Sew the narrower of the two side pieces to the stitched panel. Haven’t you learnt yet? Use pins! Rip. Pin. Re-sew! Pin last piece of backing to the panel piece, sew!
Backing finished – go and have a late lunch and read for a couple of hours!
~~~~~~
Ah, feeling better. Time to face the quilt top.
Rip the bottom row. Assess the situation. Find some appropriate scraps. Fortunately I have some strips of three of the fabrics that are used in other blocks. Measure the original blocks. Cut strips. Iron. Cut more strips. Sew strips in pairs. Join pairs (Look, mum, no pins!). Continue until blocks are made. Press, measure for size. Oops, too small.
Find another strip for each block. Rip one seam in each block. Add new strip. Press. Trim to size.
Cut 2” strips WOF to make sashing. Cut two 9” strips. Pin. Sew to blocks. Measure. Cut two 11” strips. Pin. Sew to blocks. Attach one block to the top and one block to the bottom of the four blocks that had previously been removed from the quilt top (because they have been made from the almost the same fabrics and need to be separated). Join sashing strips. Pin to side of blocks. Sew. Press.
Make another sashing strip. Add to other side using pins. Sew. Press.
Collect rest of quilt top from the family room. Look at it. Shake head. Look again! Realise the last sashing added wasn’t needed. Rip off newly sewn sashing.
Pin completed block column to rest of quilt top. Sew the last seam (finally). Begin pressing! What’s this ?!*^~*?
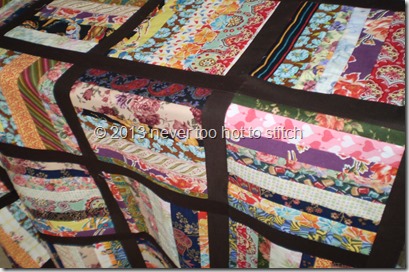 |
| Can you see the problem here? Look closely at the top two block on the right and the two below them. |
Leave it in tears. Go back to book!
Saturday 23 March 2013
What is that?
Yesterday I asked you if anyone had any idea what this is?
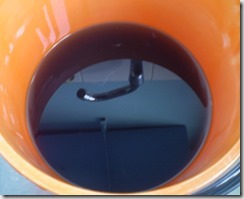
This reflection of my laundry tub tap, my friends, is perfectly clean drinking water (in an old orange bucket) after I hand-rinsed a few pieces of dark coloured fabric!
I used to pre-wash all my fabric on the advice of a friend who has been quilting for many years.
Then I started taking classes and my new teacher said it was better to sew with the sizing in the fabric. Plus I think I just got lazy!
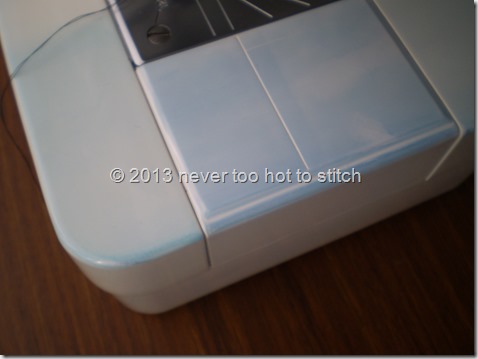
But when my sewing machine looked like this after attaching the binding,
I decided I should pre-wash; at least all my homespun (made somewhere in Asia) fabrics.
So, on Thursday, I emptied several buckets of water that looked like that, and washed dozens of metres of fabric. I have yet to iron all of them but my DD (who has returned home to prepare their house for the move and the rental market) did iron some of them – eight half-metre pieces (thanks DD).
My washing line looked like this pretty much all day (the temperature here was 30°C (86°F) with a constant breeze so it was a good day for me to get a whole lot washed and dried.
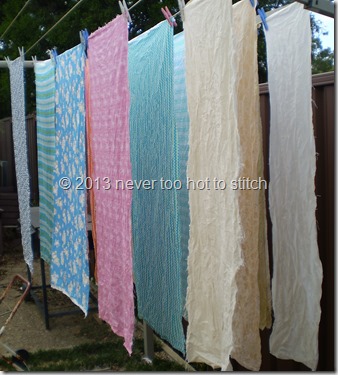
This was the first load (of light colours) and, although it may not look like it, there are fourteen pieces of fabric hanging there in the sunshine!
And this, my friends, is what the two-and-a-half seater lounge in our family room looks like at the moment.
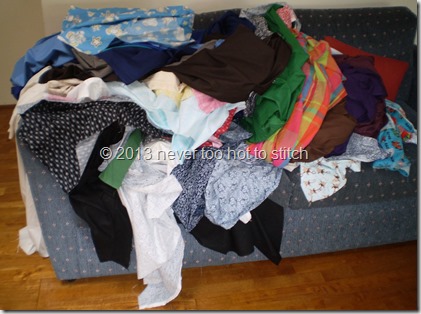
Anyone want to do some ironing in return for food and a comfortable bed? LOL

This reflection of my laundry tub tap, my friends, is perfectly clean drinking water (in an old orange bucket) after I hand-rinsed a few pieces of dark coloured fabric!
I used to pre-wash all my fabric on the advice of a friend who has been quilting for many years.
Then I started taking classes and my new teacher said it was better to sew with the sizing in the fabric. Plus I think I just got lazy!
But when my sewing machine looked like this after attaching the binding,

I decided I should pre-wash; at least all my homespun (made somewhere in Asia) fabrics.
So, on Thursday, I emptied several buckets of water that looked like that, and washed dozens of metres of fabric. I have yet to iron all of them but my DD (who has returned home to prepare their house for the move and the rental market) did iron some of them – eight half-metre pieces (thanks DD).
My washing line looked like this pretty much all day (the temperature here was 30°C (86°F) with a constant breeze so it was a good day for me to get a whole lot washed and dried.

This was the first load (of light colours) and, although it may not look like it, there are fourteen pieces of fabric hanging there in the sunshine!
And this, my friends, is what the two-and-a-half seater lounge in our family room looks like at the moment.

Anyone want to do some ironing in return for food and a comfortable bed? LOL
Labels:
DD,
fabric,
not knitting related,
pre-wash,
preparation,
quilting,
stash
Friday 22 March 2013
Black Stump Creek quilt finished
I finished this quilt three weeks ago but had forgotten to take photos so that I could post about it!
This is the quilt that I had concerns about whether I had pulled the top tight enough when basting. My teacher told me it was fine and to “get it done”!
So here is Black Stump Creek quilt.
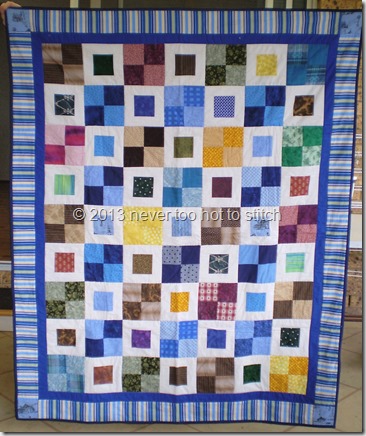
Why the name? If you look closely at the four corners in the border, you’ll see why.
Can’t see it? Do these photos help?
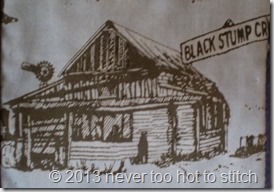
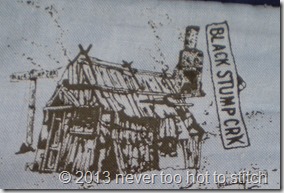
Each of the corners shows a different view of old Australian houses for common folk. “The Black Stump” is an Australian saying meaning a long way out, remote. You can read more about it on Wikipedia if you’re interested.
I’ll show you the back of the quilt but it’s not that exciting although I do love the way the pattern looks so different from a distance.

The fabric, which I bought on clearance, is “Fireworks” from the Colourblast range sold at Spotlight (Australia).
Blue dye came out of this quilt when I was sewing the binding on.
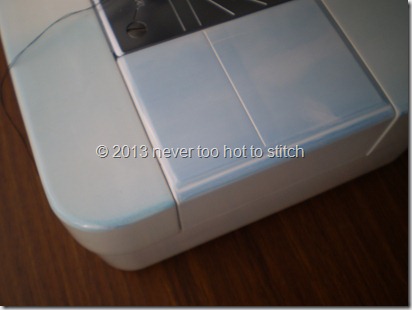
At first I blamed the backing but afterwards realised it was probably the binding fabric that was at fault.
So I have yet to wash this baby – I need to remember to buy colour catchers when I am next in the supermarket.
The good news is WM was able to clean my machine (with methylated spirits) and now it looks as good as new!
Which leads me into my trick question: can you work out what this is?

Come back tomorrow and I’ll tell you!
Linking up with TGIFF over at Marit's blog, Sew. Love. Live.

Speaking of which, I'll be hosting Thank Goodness It's Finished Friday here next week -- be sure to come back then to see another finish in March!
This is the quilt that I had concerns about whether I had pulled the top tight enough when basting. My teacher told me it was fine and to “get it done”!
So here is Black Stump Creek quilt.

Why the name? If you look closely at the four corners in the border, you’ll see why.
Can’t see it? Do these photos help?


Each of the corners shows a different view of old Australian houses for common folk. “The Black Stump” is an Australian saying meaning a long way out, remote. You can read more about it on Wikipedia if you’re interested.
I’ll show you the back of the quilt but it’s not that exciting although I do love the way the pattern looks so different from a distance.

The fabric, which I bought on clearance, is “Fireworks” from the Colourblast range sold at Spotlight (Australia).
Blue dye came out of this quilt when I was sewing the binding on.

At first I blamed the backing but afterwards realised it was probably the binding fabric that was at fault.
So I have yet to wash this baby – I need to remember to buy colour catchers when I am next in the supermarket.
The good news is WM was able to clean my machine (with methylated spirits) and now it looks as good as new!
Which leads me into my trick question: can you work out what this is?

Come back tomorrow and I’ll tell you!
Linking up with TGIFF over at Marit's blog, Sew. Love. Live.

Tuesday 19 March 2013
there comes a time...
To each of us there comes a time,
when valleys we must face.
The walls seem steep, no end in sight,
yet always there is grace.
when valleys we must face.
The walls seem steep, no end in sight,
yet always there is grace.
from the poem "Valleys" by Debra Isenbletter
Last weekend, WM and I had a wonderful couple of days away, the details of which will be for another post. On Sunday we had a brief visit from our DD, her husband and our two grandsons.
DD mentioned, very casually, that they would be travelling north on Monday. It was only later that it dawned on WM and I that we had just kissed our grandsons goodbye. We thought we had until after Easter but they are gone. DD will be back to prepare the house for their move but the boys will not come home.
I cannot begin to tell you how painful it is, how long the valley seems, how steep the walls appear!
The sun is shining, the birds are singing, and still my heart aches.
But there comes a time when one must push past the pain and resume one's life. As Debra Isenbletter says so simply, "always there is grace". With God's grace, I can move on through this. With trust, I can believe that "all things work together for the good of those who love Him and are called according to His purpose" (Romans 8:28).
Today I will tidy my sewing room and make room for some creativity. I will take my sewing machine out of its travel case where it has been for two weeks. And I will stitch my love for our grandsons into a quilt that will be given to someone in the palliative care unit of a local hospital.
May it bring comfort to the recipient and I!
Labels:
Christianity,
DD,
faith,
family,
grandsons,
not knitting related,
trust,
WM
Tuesday 12 March 2013
this made me cry
My friend Susan, who blogs at Susan in Stitches, posted a video on her blog recently.
It made me cry it was so beautiful. I know I'm sad at the moment and likely to cry easily but when I looked at the comments on Susan's blog post, I saw that everyone had had the same reaction!
Please it check out here - it's a great feel-good story!
It made me cry it was so beautiful. I know I'm sad at the moment and likely to cry easily but when I looked at the comments on Susan's blog post, I saw that everyone had had the same reaction!
Please it check out here - it's a great feel-good story!
Sunday 10 March 2013
This is why....
In a previous post, I mentioned two family “issues” which I should have called “situations”.
The first was a good one, resulting in a closer relationship with my husband, a Wonderful Man (WM).
The second one is painful… heart-breakingly so – well, at least for WM and I.
DD and SIL have decided to move 585km (365 miles) away to a small town on the NSW mid-north coast.
SIL has quit his job in Sydney because of high stress levels. He has accepted a job working in his family business as an office administrator and part-time receptionist.
They will rent in their new town and will put their current home on the rental market so that they will always have a foothold in the Sydney real estate market. They are currently packing and will be gone before the end of March.
This news is sudden and, although not entirely unexpected, leaves WM and I bereft. DD is our only child and her sons -- the joy of our lives -- are our only grandchildren.
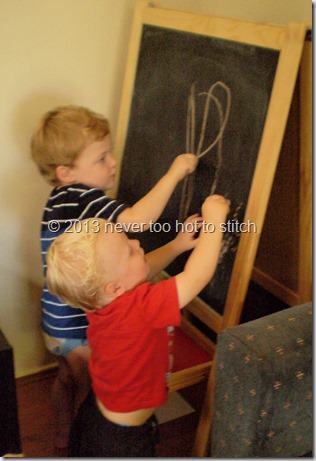
We cannot follow; WM has a job here and at his age, finding another is unlikely.
If you are a praying person, we would appreciate your prayers, especially for DD who has always been close (physically and emotionally) to her parents.
In preparation for the move, we have been child-minding and/or helping them to get their house ready for the rental market. We are both sad and tired. Is it any wonder I haven’t been crafting or blogging?
And if you're wondering how I cope, I lose myself in the alternate reality of reading fiction!
The first was a good one, resulting in a closer relationship with my husband, a Wonderful Man (WM).
The second one is painful… heart-breakingly so – well, at least for WM and I.
DD and SIL have decided to move 585km (365 miles) away to a small town on the NSW mid-north coast.
SIL has quit his job in Sydney because of high stress levels. He has accepted a job working in his family business as an office administrator and part-time receptionist.
They will rent in their new town and will put their current home on the rental market so that they will always have a foothold in the Sydney real estate market. They are currently packing and will be gone before the end of March.
This news is sudden and, although not entirely unexpected, leaves WM and I bereft. DD is our only child and her sons -- the joy of our lives -- are our only grandchildren.

We cannot follow; WM has a job here and at his age, finding another is unlikely.
If you are a praying person, we would appreciate your prayers, especially for DD who has always been close (physically and emotionally) to her parents.
In preparation for the move, we have been child-minding and/or helping them to get their house ready for the rental market. We are both sad and tired. Is it any wonder I haven’t been crafting or blogging?
And if you're wondering how I cope, I lose myself in the alternate reality of reading fiction!
Thursday 7 March 2013
2013: the Year of the Finished Project -- March
The second half of February was a non-crafting fortnight for me. Apart from attending my weekly quilting class and knitting some hats for the local hospital's neo-natal unit, I did almost no knitting, and no sewing of any kind!
There is a reason for all of that but this post is not the place for sharing what I can of my family situation.
This is the place to review last month’s goals and publish new plans for the month of March which, I’m sure, you are already working towards given that the first week of the month is already behind us!
Please link below with the URL of your review/goals post (not just your blog URL).
~~~~~~~~~~~~~~~~~~~~~~~~~~~~~~~~~~~~~
Here is the list I wrote for February:
- Ben's birthday surprise – every time I tried to work on this I just couldn’t; I didn’t think he would like it so I didn’t devote any time to it!
- Westall cardigan – managed to knit a few rows and am about half way through the bottom ribbing.
Black Stump Creek quilt– finished 9 February; there will be a separate post about this tomorrow (I hope)- hexagon project bag – didn’t touch it
- Scrappy Log Cabin quilt – didn’t touch it
- Earth and Sky quilt – didn’t touch it
- Deb's Diamond Blanket – didn’t touch it during February, this is a long term project
- placemats for the Grandsons – this was to have been my new project for February and I could have started it because I had finished two quilting projects since 1 January but, like everything else, I didn’t touch it!
- piano cross stitch – didn’t touch it
- Earth and Sky quilt – WIP – at this stage it’s still separate blocks, by the end of March I plan for a finished quilt
- Scrappy Log Cabin quilt – UFO – at this stage it’s a flimsy requiring a border, by the end of March I plan for a finished quilt
- Scrappy Strings II quilt – UFO – at this stage it’s a too big flimsy with a too big backing, by the end of March I plan for a finished quilt
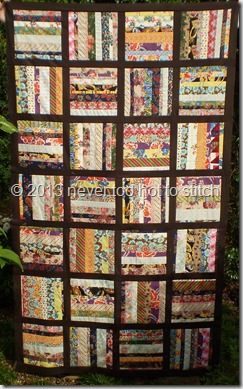
- at least one quilt for Blankets With Love – this will be my new project for March
- Westall cardigan – WIP – finish ribbing, knit sleeves
- hexagon project bag – WIP – my “slow stitching” project
~~~~~~~~~~~~~~~~~~~~~~~~~~~~~~~~~~~~~~~~
Labels:
cardigan,
goals,
knitting,
quilt blocks,
quilting,
quilts,
sewing,
The Year of the Finished Project
Subscribe to:
Posts (Atom)
