Sorry, this page is without photos. I took them and edited them but our new modem pastes them into Blogger in various colours which are nothing like the colours of the photos I took. So, until I can figure out this latest piece of lunacy in our ongoing saga to move into the 21st century with our internet connection, there will be no photos on my posts!Apologies again!~~~~~~~~~~~~
After illness in the family (they've all had colds or respiratory tract infections), DD and the grandsons finally visited our place yesterday. It's only been two weeks but it seems much longer!
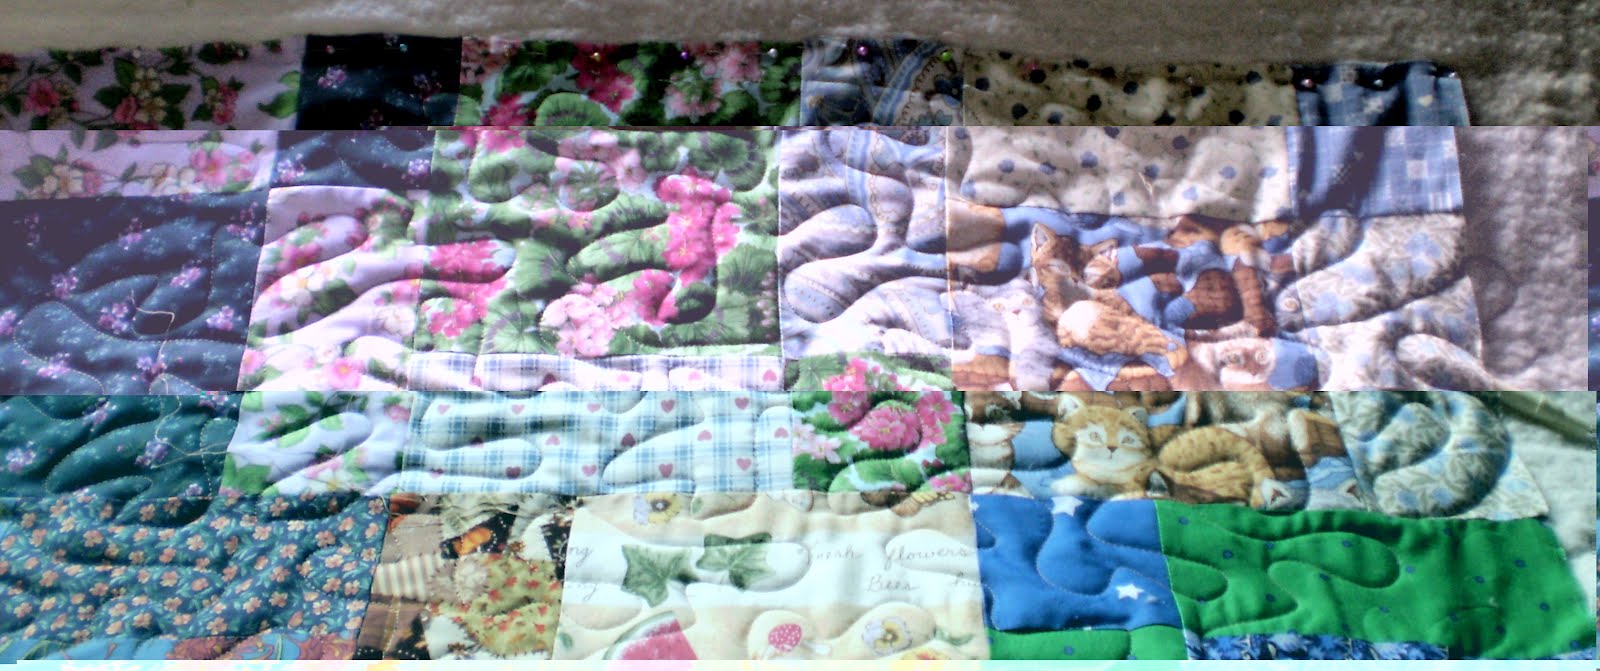
DD and I finally got to the quilting frame! We adjusted the way we had loaded the quilt (aeons ago) and taped down the pantograph (thanks C.). It didn't take long before we realised that neither of us is capable of sewing a straight line across the top of the quilt to hold it in place! Much unpicking ensued! (This happened to me two weeks ago and to her yesterday).
So, rightly or wrongly, we decided to pin the quilt top instead of stitching it -- I think hand basting would have been faster since we pin head-to-point!
Then, we both took a deep breath, I put my foot on the pedal and she guided the machine.
The first run (across the width of the quilt) took longer than expected but turned out beautifully!
The second run was good but the last couple of inches (on the right) looked a bit wonky!
We thought it would be okay when the binding was put on so we d
id a third run. The bobbin thread ran out about two thirds of the way across so we had to stop and wind a bobbin - but why stop at one? We wound five (that's all the empty bobbins we had).
We finally finished the third run (in very poor lighting conditions) and it was then we realised that all was not okay - things on the right side were getting progressively worse and by the time we did the ninth or tenth run at the bottom of the quilt it would be a very big mess.
When we unrolled the already-quilted section I could see instantly where we had gone wrong - we had not pinned the top edge of the quilt top square and straight. Because it curved where we pinned it, it curved all the way down the right side leading to bunching and buckling!
And so, with another big breath and a deep sigh, we did the inevitable - we began unpicking those teeny, tiny stitches!
We will see if we can get away with just unpicking the blocks on the right rather than undoing all our work.
But -- the good news is: the machine behaved beautifully and our tension was spot on! Once we iron out the basics, we should get better (and quicker) at this!


